
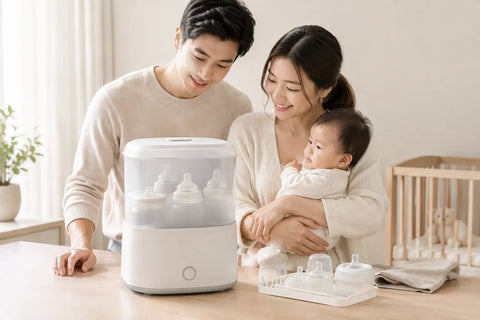
A steriliser often earns its place on the kitchen counter during the least glamorous moments of early parenthood: when bottles are waiting after a late-night feed and there is very little time to spare. This baby steriliser buying guide focuses on the practical details that make a real difference - how you feed your baby, how much space you have and how you want your daily clean-up routine to feel.
A steriliser is designed to be used after items have been thoroughly washed. It does not replace careful cleaning of bottles, teats, pump parts or soothers. Before choosing one, check the care guidance supplied with each feeding item and follow the steriliser manufacturer’s instructions for compatible materials, loading and cleaning.
Start with your feeding routine
The right size and style depend less on a single feature and more on the rhythm of your household. If you mostly breastfeed and express occasionally, a compact option may be enough for a few bottles and pump components. If you bottle-feed regularly, or share feeding between caregivers, a larger steriliser can reduce the number of cycles needed each day.
Think about the items you will actually sterilise. Bottles are only part of the picture. Teats, caps, dummies, breast pump parts and small accessories can quickly fill a basket. A model with well-designed racks or adjustable sections can help keep pieces separated, so water and steam can circulate as intended.
It is also worth considering who will use it. A clear setup, simple controls and an easy-to-read cycle indicator can make the routine more manageable when different family members take turns. The most suitable choice is usually the one that fits comfortably into your existing habits, rather than one with features you are unlikely to use.
Baby steriliser buying guide: choose the method
There are several common sterilising methods. Each can suit a different home, depending on your available space, preferred routine and the items you use.
Electric steam sterilisers
Electric steam sterilisers sit on the worktop and use water to create steam. They are a convenient choice for families who sterilise several items at once and would prefer a dedicated appliance. Many have a straightforward cycle: load clean items, add the required amount of water, start the programme and allow everything to cool before handling.
Their main advantage is capacity. Depending on the design, an electric steam steriliser may accommodate bottles alongside smaller accessories, helping to streamline a busy feeding routine. The trade-off is counter space. Measure the area beneath cupboards as well as the footprint on the worktop, particularly if the lid opens upwards.
Look closely at how easy the model is to fill, empty and wipe down. In Singapore’s humid climate, it is sensible to allow the appliance to dry fully after use and to follow its descaling instructions. Water marks and limescale can build up over time, especially where appliances regularly heat water, so simple maintenance matters.
Microwave sterilisers
Microwave sterilisers are typically compact containers that use steam generated in a microwave. They can be a practical option for smaller kitchens, occasional use or families who prefer to store the steriliser away between cycles.
Before buying, check that the unit fits your microwave and that its shape works with the bottles you use. Consider the handling too. The container and its contents may be hot immediately after a cycle, so a secure lid, sensible handles and clear cooling guidance are useful details. Microwave options can offer good everyday convenience, although they rely on having the microwave free when you need it.
UV sterilisers and drying units
Some countertop units use UV light and may include a drying function. These can appeal to parents who value having bottles dried and stored in the same appliance, particularly when air-drying space is limited. The design may also suit a calm, uncluttered kitchen setup, as clean items can remain inside until needed.
As with any appliance, capacity and internal layout deserve careful attention. Check whether taller bottles, pump parts or wider accessories fit without forcing them into place. UV units may have a larger footprint and can cost more upfront, so they tend to make most sense when drying and storage are priorities as well as sterilising.
Cold-water sterilising systems
Cold-water systems use a sterilising solution in a container, following the product directions for dilution and contact time. They can be helpful when travelling, during a move or when access to a microwave or plug socket is limited.
They do require a separate preparation step and regular solution changes. Some parents appreciate the flexibility; others prefer the simplicity of a heat-based cycle. If this option appeals, choose a container that is appropriately sized for your usual items and easy to keep clean between uses.
Capacity is about more than bottle numbers
A box may state how many bottles a steriliser holds, but that figure does not always reflect the way your family feeds. Bottle shape, height and the number of loose components all affect usable capacity. A unit that holds six bottles may feel cramped once teats, rings, caps and pump valves are included.
If you are choosing before your baby arrives, imagine one full day rather than one feed. How many bottles might be in use? Will you be expressing? Do you want room to sterilise dummies separately from feeding equipment? A little extra capacity can be useful, but oversized appliances can dominate a compact kitchen.
Adjustable baskets are particularly helpful because your needs may change. A newborn feeding routine can look very different a few months later. Flexible storage allows the steriliser to remain useful without taking up more room than necessary.
Consider drying, storage and counter space
Sterilising is only one stage of the routine. Once a cycle is complete, you need a clean place for items to cool and remain covered until use. A steriliser with a lid that keeps items enclosed can reduce clutter on the worktop. A drying function may be useful if you do not have space for a separate drying rack, although it is not essential for every household.
Think carefully about where the appliance will live. Keep it on a stable, heat-resistant surface with the clearance specified by its manufacturer. It should also be somewhere that feels easy to access, rather than a cupboard you will need to empty every time. In a smaller flat, a compact model that stores neatly may be more valuable than a high-capacity unit.
For a more organised feeding area, keep the steriliser close to where bottles are washed and prepared, while still following appliance guidance on placement. This can make the repeated steps of washing, sterilising, cooling and assembling feel calmer and more efficient.
Small design details matter every day
A steriliser does not need complicated controls to be useful. In fact, clear design is often the better choice when you are tired and juggling several tasks. Wide openings make loading easier. Removable baskets can simplify handling. A clear water measure helps avoid guesswork, while an automatic shut-off can be a reassuring convenience feature where included.
Check the parts that will need regular cleaning. Can the lid, racks and drip tray be removed easily? Are there narrow corners where water may collect? A machine that is awkward to empty or clean can soon become frustrating, no matter how attractive it looks on day one.
Noise may matter too. Some appliances use fans during drying cycles, while steam models may make sounds as water heats. If your kitchen is open to the living area, it is worth considering when you expect to run cycles and whether a longer drying programme suits your household.
Check compatibility and care instructions
Before committing, confirm that your bottles, teats, pump parts and any other accessories are suitable for your chosen method. This is especially relevant for items with electronic components, silicone parts or specific cleaning instructions. Use only the cycle settings, water amounts and care methods recommended by the appliance and item manufacturers.
Do not overlook ongoing care. Ask how often the unit should be descaled, whether replacement parts are available and how it should be stored when not in use. A product with clear instructions and accessible local support can make ownership feel much simpler, particularly during the first months of parenthood.
A considered choice for everyday family life
There is no single right steriliser for every home. A compact microwave unit may suit occasional use and limited counter space, while a larger electric or UV model may suit families who want to manage more equipment in one place. Start with the routine you have now, leave room for how it may change, and choose a design you will find easy to clean, use and live with each day.
The best addition to your feeding area is not necessarily the largest appliance or the one with the longest feature list. It is the one that brings a little more order to a very full season of family life.